Braided Rag Rug Tutorial
Make a Braided Rag Rug!
My love of old tees only keeps on developing!
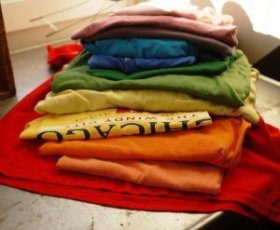
See this pile of old tees – they are going to come to be a fabulous rainbow rug!
Begin by collecting a colorful heap of old t-shirts. In order to make a 36″ circular rug you will need about 10 to 12 t-shirts.
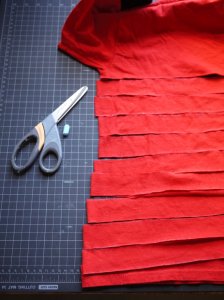
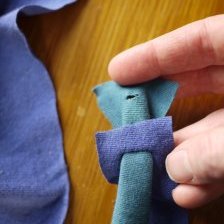
Slice the tops into many pieces, I made mine 1 1/2″ large hence did actually work great. You will definitely today braid your pieces together to produce a single extremely lengthy braided rope.To start, just take three t-shirt strips and sew them collectively at one end. Start braiding!
 I used a curtain rod clip to hook one end of my braid to a chair to offer tension while braiding. A clothes pin normally great for keeping your braid tight. As you started to the termination of very first period of pieces it is important to include even more size. Connect strips collectively to add more length – cut a small slit in the stops of your pieces. Thread brand-new strip through opening, cycle it's end through on its self and pull tight.
You may will have extended your strip! It is important to stagger your strip extensions in order that they are not all lumped in one spot-on your braid.
So now you are ready to braid and braid and braid!
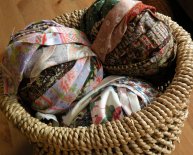
 When you get tired of braiding it is fun to coil your rope and see what sort of development you are making.
If you have finished your braided line it’s time for you to start stitching.
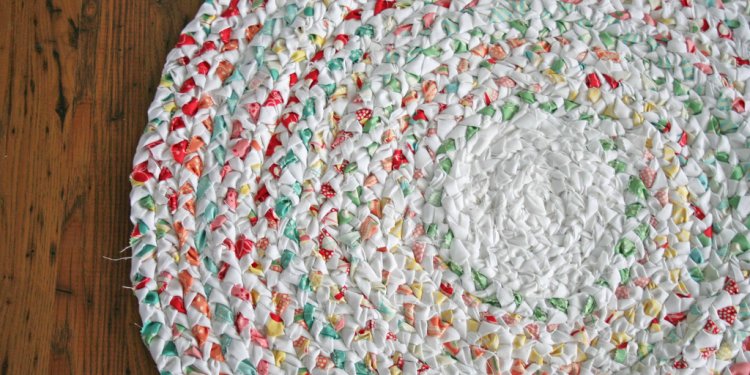
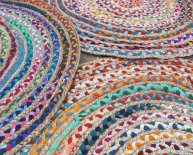
Set your sewing machine when it comes to widest zig-zag stitch, firmly coil your braid, stitch round and round. Whenever sewing push the 2 braids collectively firmly with your arms, watch your stitches carefully to make sure these are generally linking the seams. The hands are certain to get exhausted from all the pushing, I found it had been easier to set my adjustable seat higher to get much better influence while stitching. Try not to extend your rope an excessive amount of while sewing since it will cup like a bowl. But don’t fear a hot metal can correct the cupping. From time to time your bobbin will run out of bond, this is a good time for you iron your rug flat. Set the metal to hot, begin as well as the center and iron down toward the edges. Repeat on both sides.
This rug at this time steps 34″ across and took me on a daily basis to help make. I'ven’t done the stops down yet because I think i wish to make it quite larger – i simply discovered a pile of grey tops that i'm hoping provides it nearer to the size I was dreaming of. I am going to simply take another image of it completed and in spot next week. I just needed to share it today because I was therefore excited stitching this together. I adore the colors and body weight with this carpet. I will be already thinking associated with after that one!!
Maybe sea colors?
Tags: Captain Crafty Studio, home and Farm, create your very own, stitching, tutorials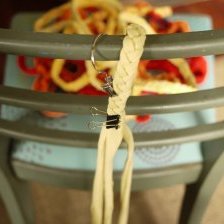


Share this article
Related Posts
Latest Posts


