Braided rugs instructions
 Our lives are busy these days that handful of us possess time to create these stunning art pieces. But for those that do, you certainly will enjoy particularly this instructional article.
The addition of a handmade rug to your house is often a reason for pleasure. To attempt effortlessly sufficient reason for satisfying results each and every time, is almost unbelievable. But these types of is the situation once you follow these easy guidelines for braiding a rug.
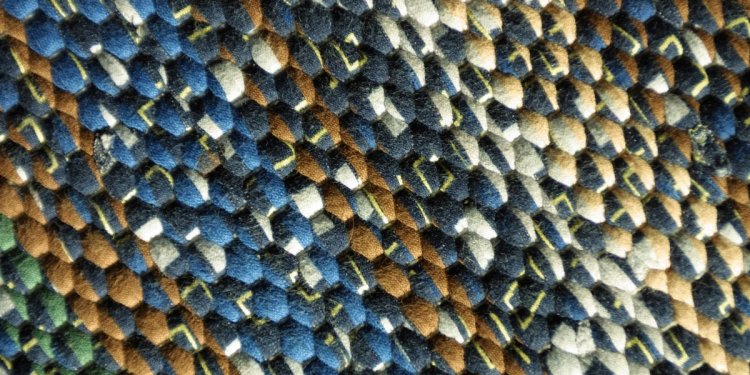
Collection of Fabric-Fabrics many adaptable tend to be wool and cotton fiber. Colors of rug are plumped for to accent space color, making use of three of four various colors, or many colors for a bright multicolored impact.
Condition of textile determines how long rug will wear; for that reason, make use of brand new or practically new material.
Right planning of braiding pieces is very important. Reduce material into pieces one to three inches wide- fat of textile determines width. The weightier the fabric the narrower the pieces. Sew pieces together diagonally making sure that when folded for braiding there may not be a thickness at seam. Make sure that each strip is exact same thickness, otherwise finished article will buckle or ripple. Take each strip-fold each side to center-then fold strip by 50 percent. You'll slip-stitch these pieces to organize for braiding. Wind pieces around a discarded cardboard roll.
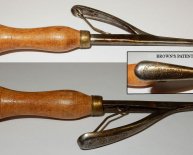
Braiders for strip folding can be used. They are usually metal cones, whereby pieces are threaded, folding in raw sides, developing circular even braids for easy and quick braiding.
Braiding-The braid explained here is known as three-strand braid. It is extremely easy, but here are a few strategies for getting most readily useful outcomes. Just take three strips of product which were prepared. Sew them together at finishes. Sew just eight or nine legs of pieces collectively at one time or braid becomes tangled. Join end of braid to something stable. Mentally number strips from a single to three, from kept to correct, then begin braiding. Pass strip three over center strip two and under strip number 1. Keep on with this same treatment until three of four yards are braided, after that start sewing or lacing carpet collectively.
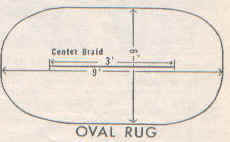
Model of Rug-For an oval rug, start with center braid which steps as long as the essential difference between width and period of finished carpet. As one example: a 6 x 9-foot carpet would need a 3-foot center braid. An 8 x 10-foot or 4 x 6-foot rug would require a center braid of two feet. Turn braid and fold straight back the same size in hairpin form. Lace (see sketch) or sew both of these together hand and hand. Lacing collectively tends to make carpet reversible. Sew round and round this core with a large needle and carpeting bond. Be careful and never pull or stretch braiding strip whenever sewing or lacing.
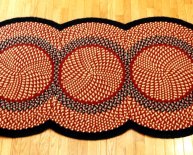
The directions for a round rug tend to be comparable except that you start rug in form of a spiral.
To help make a rectangular carpet, make starting braid more than two times as lengthy as finished length or rug. As this size is calculated for starting braid, allow one or more inches per foot extra which can be lost in very first lacing. Pin braid at level showing period of first braid and cut braid near pin. Carry 2nd braid to beginning of very first braid and lace first and second braids together, making certain to match loops of braids to attain pattern effect desired. It is best to lace 3rd braid to contrary part of first braid and still lace to alternate sides as braids are added. This will cause a straight level carpet if braiding is fast and also. When desired size is reached, stitch across each end to secure braids. Stitch rug binding tape across both stops.
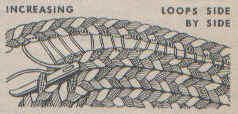
Lacing: Along straight sides of carpet the loops of each braid are hand and hand to create an available "V" or chevron. Using a curved needle or bodkin and carpet (linen) bond, lace through alternative loops of adjoining braids ( see sketch). When rug starts to curve another method can be used. To permit fullness needed to hold rug level it's important to increase by lacing thread through 2 loops on brand new braid and continuing to lace through alternative loops on carpet (see design). Make sure you boost enough at each and every bend to permit rug to lie level.
Share this article
Related Posts
Latest Posts


