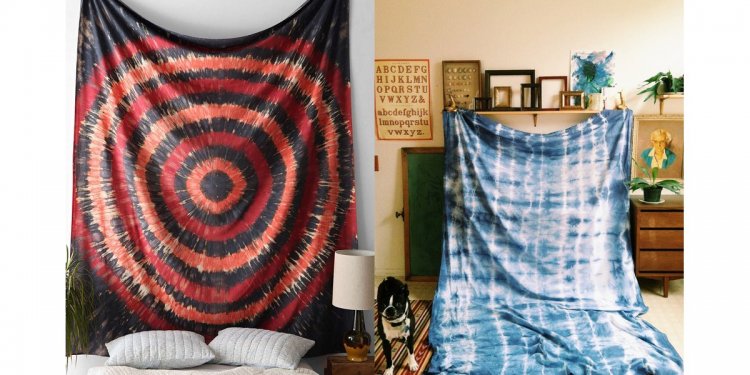
DIY Tapestry
Holding a tapestry can add a lovely design function to your house. Whilst in the pastthey have known large, hefty woven material that is used as wall décor or upholstery, today they may be manufactured from any textile. They are breathtaking and will also be very helpful.
They can include a design factor to a space to add color or surface, and also reduce noise, echoes and ambient sound.
There are lots of different ways to hang tapestry, and far of that is dependent on the kind of fabric you are hanging.
Different ways:
If using much textile:
Hang a rod and produce a rod pocket
Utilize Velcro over a board
Use baseboard
If using a less heavy textile:
Mount on stretcher
Connected to the wall with thumbtacks (dormitory spaces)
Hang with bands
What kind of materials are you able to hang?
You need to use actual tapestries, rugs, your chosen fabric, grandma’s quilt, and/or a runner from your marriage.
STEPS
1. Measure wall/niche: first thing you need to do is gauge the location you want to hold this tapestry. I would recommend calculating the location, then cutting your fabric to make certain that there’s a 6” gap all the way around your orifice, with twice as much amount on top to utilize to make a rod pocket. (If this is from the wall surface rather than a distinct segment, you are able to it any dimensions you want). Since my material has already been 4’ wide with a border, I will leave the width and just cut the length. The measurements of my niche are 51” large x 86” very long.
2. Cut your fabric to the correct length. You can do a detailed cut on the bottom or cut straight across. I would like a little variation, so I will cut mine at an angle. This is what is known as a dovetail cut. The easiest way to do this is to fold your fabric in half and cut both sides together. This will ensure that you have an even cut on both sides (a great tip for cutting ribbon as well).
3. Formulate your tapestry on a work area face down. If your material is wrinkled, this would be the best time to iron it.
4. Make the top of the tapestry and fold it over your rod, making some a gap across the pole.
5. Take your glue and range the edge of your textile and affix it into the backside of this tapestry.
6. Enable glue to dried out completely.
7. Connect any finials towards finishes for the pole.
8. Make the brackets and hardware and attach these to your wall just outside the width of tapestry. You might need drywall anchors to hold these into location. Connect the brackets so your tapestry hangs about 6” down from top (or equidistant to your bottom measurement).
Share this article
Related Posts

Latest Posts


